Advanced Drawing and Painting
We will be looking at works of art by Pablo Picasso in the next couple of weeks. I first fell in love with the work of Picasso when I was in Barcelona and visited the Picasso Museum. Up until then I hadn't realized that as a teenager he was painting stunning realistic oil paintings, rendering fabric like Da Vinci. I always thought of Cubism when I thought of Picasso, not realism. My limited exposure to Picasso didn't make me feel like he was an artist that I needed to discover more about...was I wrong. His work was constantly evolving...his critics and the world loved him for that.
At the age of 76 Picasso said, "Everything I have done is just the first step on a long path. It is only a preliminary process, which must be developed much later on. My works must therefore be considered each in relation to the others, always taking into account what I have done and what I am going to do."

Thursday, March 6, 2014
A Unique Portrait
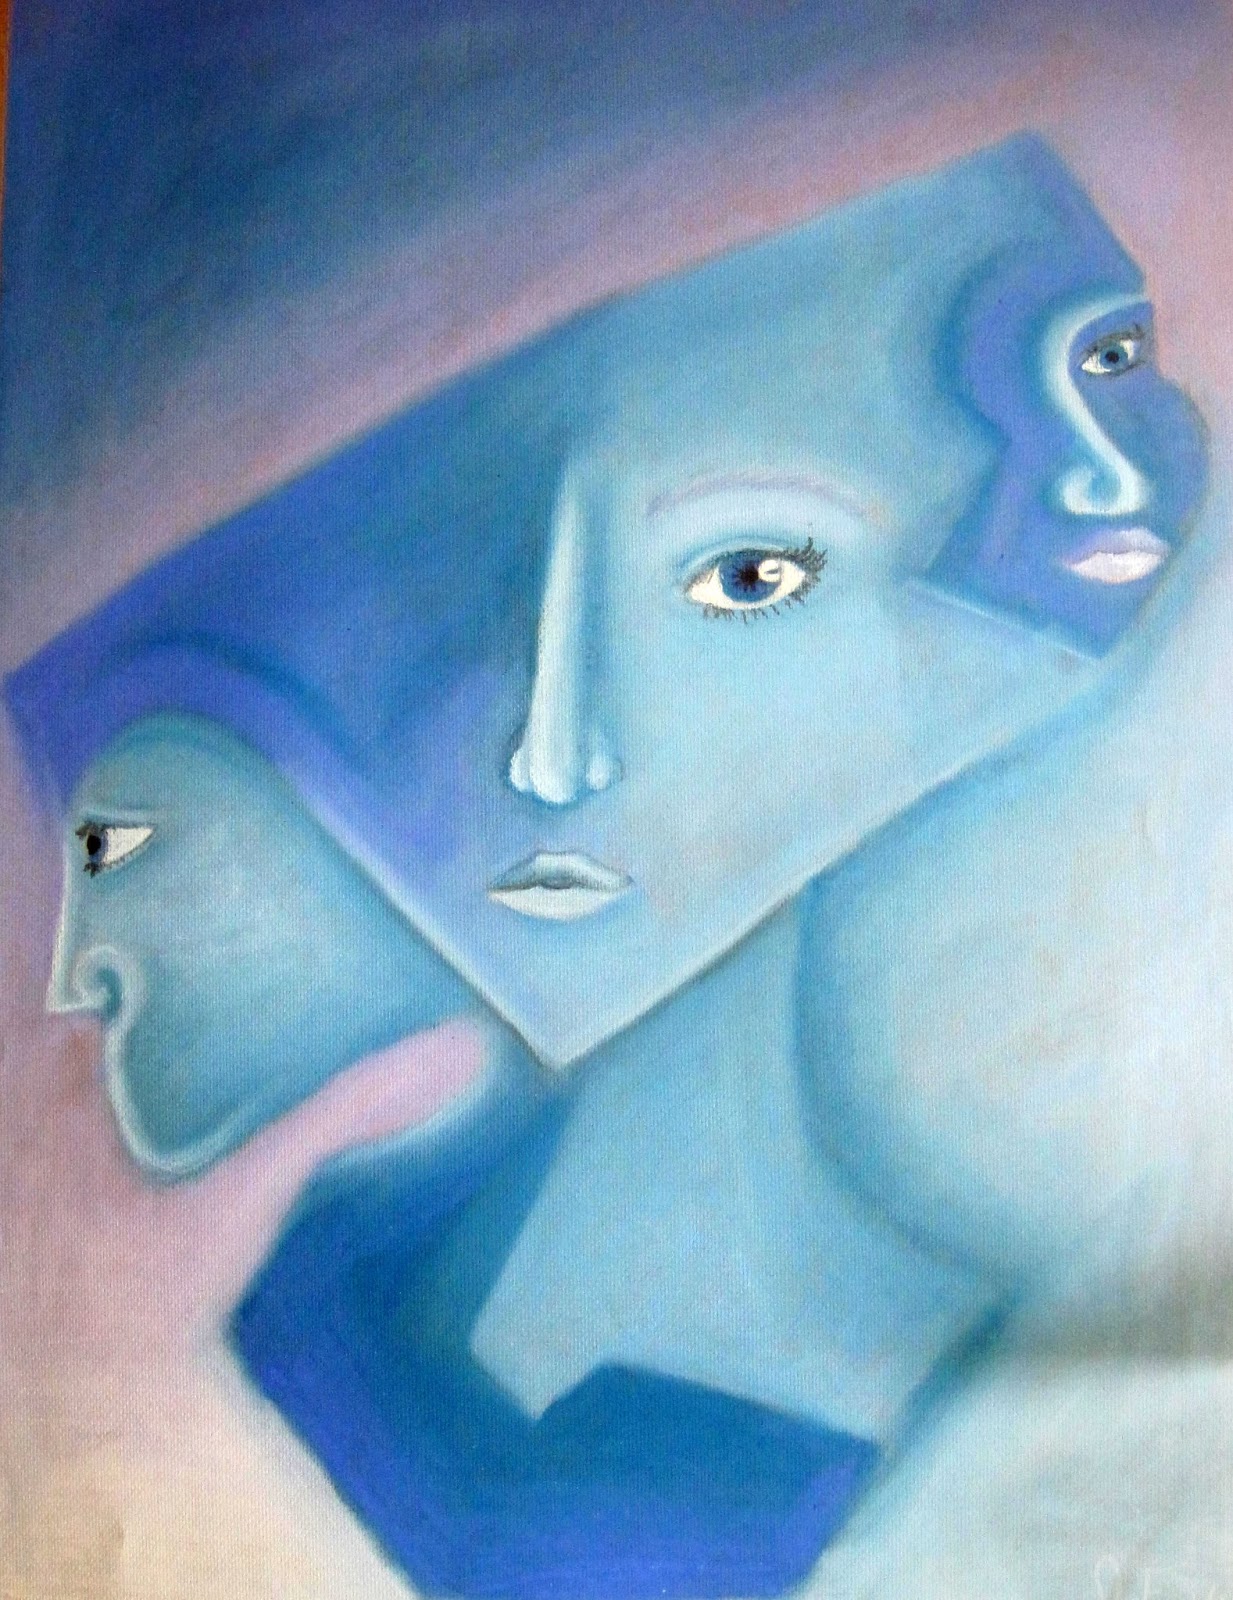
Now that we have studied the art work created by Picasso in class and discussed the amazing evolution of his art, it is time to create a work of art based on the portraits he painted during and after the birth of cubism. Your portrait should somehow combine 3 views of a face. How do you do this? Work it out in your sketchbook. Overlap different views of a face you have already drawn or someone you want to draw. Combine the faces by connecting them with lines, omitting some features, emphasizing others...experiment.
Picasso painted hundreds and hundreds of original creative portraits of people. Some were realistic, expressionistic, cubist...etc. Even though you are using Picasso as inspiration your portrait will be an original because you will put your twist on it.
Color: Choose an analogous or monochromatic color scheme for the portrait then decide if you want the background to stay within that color scheme or clash with it.
Movement: Create movement within the piece by placing like colors in different areas of the artwork or by drawing lines that connect the faces or areas of the artwork.
Emphasis: Where is the focal Point? Is there an place that you want the viewer to go to in your piece? How can you lead them there? Maybe with color or placement of shapes and lines.
Balance: When deciding your composition weight the areas evenly. Notice below how negative and positive space are balanced.
 |
| By Jane B, 2012 |


 |
| Clare H, 2012 |
 |
| Clare H, 2012 |
 |
| Brooke D, 2011 |
 |
| Josephine F, 2011 |
 |
| Picasso's sketches of James Sabartes. |
 |
| Final painting, notice the references to the details in the sketch. |
 |
| In this painting Picasso is starting to combine views of features. |
Wednesday, March 5, 2014
Creating a UNIQUE creature
Designing for the Web
There are tools in Photoshop that can make elephant skin look like lizard skin. In this lesson you will delve deeper into the magic of photoshop. Take a look at your next lesson to find out more.

There are tools in Photoshop that can make elephant skin look like lizard skin. In this lesson you will delve deeper into the magic of photoshop. Take a look at your next lesson to find out more.

Sunday, March 2, 2014
Drawing Ellipses
Intro to Drawing and Painting
 Now that you are becoming more observant and have completed gesture drawings and contour drawings we will start creating three-dimensional images by adding values and thinking about perspective. A good place to start is by drawing cylinder-like objects, We will be focusing this week on creating representational drawings of cups and flower pots, paying close attention to where the light hits the objects and how highlights, core shadows, reflected light, and cast shadows create depth on a two-dimensional surface.
Sketchbook Assignment: Draw 3 objects that are elliptical. Focus on the value changes that will help you make your drawing have depth.
Due. 3/14
Previous student work:


Sketchbook Assignment: Draw 3 objects that are elliptical. Focus on the value changes that will help you make your drawing have depth.
Due. 3/14
Previous student work:


View the link below to a wonderful tutorial on drawing ellipses:

Creating Values
We are going to be shading our drawings from here on out. Shading the values correctly will help us create a 3D "like" form on a 2D piece of paper. Start by drawing a shell of your choice. Hold the shell in your hand,feeling the texture of the shell. Notice the proportions of the shell. Place your shell on a white piece of paper. How does the light source create highlights and shadows? Notice the varied values used in these drawings to create the illusion of depth and texture.
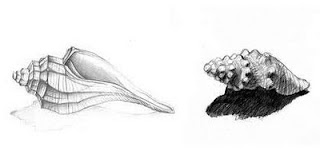 Study your shell. Observing the object you are drawing is crucial. Take your time, settle in. There are many ways to begin a drawing. You could very quickly draw a light sketch representing the "skeleton" of your shell using shapes. You could choose to draw gesture-like lines to represent the overall shape of the shell. Another option is to create a contour drawing of the shell. What are you comfortable doing? Try beginning in a variety of ways it is up to you. You can start to add darker values after you feel you have the shape of your shell represented correctly on the paper.

All images were acquired from the internet for educational purposes.
Advanced Drawing and Painting
 |
We are going to be shading our drawings from here on out. Shading the values correctly will help us create a 3D "like" form on a 2D piece of paper. Start by drawing a shell of your choice. Hold the shell in your hand,feeling the texture of the shell. Notice the proportions of the shell. Place your shell on a white piece of paper. How does the light source create highlights and shadows? Notice the varied values used in these drawings to create the illusion of depth and texture.
 Study your shell. Observing the object you are drawing is crucial. Take your time, settle in. There are many ways to begin a drawing. You could very quickly draw a light sketch representing the "skeleton" of your shell using shapes. You could choose to draw gesture-like lines to represent the overall shape of the shell. Another option is to create a contour drawing of the shell. What are you comfortable doing? Try beginning in a variety of ways it is up to you. You can start to add darker values after you feel you have the shape of your shell represented correctly on the paper.
In a couple of days you should have a few sketches of the same shell in your sketchbook. This will be graded as a sketchbook assignment.

All images were acquired from the internet for educational purposes.
Intro to Drawing and Painting
Complete a pencil drawing in your sketchbook of a sphere or egg that clearly shows the 5 elements of shading. Make sure your object is lit from one side (preferably) from above. Take a look at the "shading document" to better understand these elements. This assignment is due on Friday March 7th.

Complete a pencil drawing in your sketchbook of a sphere or egg that clearly shows the 5 elements of shading. Make sure your object is lit from one side (preferably) from above. Take a look at the "shading document" to better understand these elements. This assignment is due on Friday March 7th.
Subscribe to:
Posts (Atom)