Tuesday, December 9, 2014

Add a Background in Dreamweaver


Now that you have gotten familiar with div tags and css styling lets do something simple.  Adding a background color or image behind the container div is a good idea.  It will add depth to your site and also frame your container.  I will add a long narrow gradient strip that is repeated.  This will take up less space in your site folder and will load much faster than a large photo of the same gradient.  

(25 px by 1500 px)


 At the bottom of the page you will find the page properties panel.


Choose CSS Appearance.  Select the background image in your images folder of your website, and repeat X.


Sunday, December 7, 2014

Beginning Steps of Dreamweaver

As we begin to design in Dreamweaver there are crucial steps that need to be taken to make the website work properly. I will review each step every day but you must also take notes and refer to tutorials that are provided to help you understand the process.

We have already:
  • "Defined" our site by directing Dreamweaver to our site (root) folder.  It is crucial to do this every day if your site folder isn't already in the files panel. 
  • Made our home page by creating a file called index.html in the files panel.
  • Learned how to create Navigation Buttons in Photoshop and insert them into our page. Insert>image object>rollover image.

Now we have to learn to insert Div tags, the boxes that organize our webpage. We will use html and css during this process.

Remember to:
  • Insert a div tag by going to Insert Layout-Object
  • Insert div tag at "insertion point" if it is the first tag to go onto a page like the container
  • Insert div tag "after start of tag"  means "inside of".  Banner tag would be the first to go inside of the container so you would use "after start of tag" for the banner tag. 
  • Insert div tag "after tag" means directly after another tag that is in the container so the next tag would be the navbar (after banner).
  • Float tags left or right if they are lining up next to each other.  The next  divs would be content 1 and content 2...etc.
  • After you place another tag after tags that are lined up next to each other (floated) you need to clear the tag in the properties panel.  A footer would be an example of this
Watch the following tutorials after I present if you need help and would like to review the process.  The way I am showing you to do things is just one way to create a page in Dreamweaver you will find many variations. 


Thursday, December 4, 2014

Ceramics Finale

Final Exam Project
Advanced Ceramics


The final exam consists of  three components:

·         Fabulous final ceramic piece 60%
·         Final formal critique 20%
·         Final reflection 20%


The FABULOUS final exam piece will be a ceramic project  of  your choice that shows the proficiency you have in hand-building...with a twist.  You should use the skills you have acquired to create a more elaborate ceramic version of a previous piece.  The twist is you must  incorporate the influence of an iconic work of art in your piece. 


Monday, November 24, 2014

The "home" page....

Designing for the Web

As we begin designing our home page for our website we need to understand what makes the home or index page successful.  The home page is the first page a viewer sees so it needs to function properly and be appealing. We will view several websites in class and discuss what elements are making it work or not.  You will then find two websites that you will critique.  One should be an example of a poorly designed site and the other a successful one.  Use the, "Elements of a Successful Website" document as you critique the websites.  View the "Website Critique" document for your complete assignment.

Flash Final Reflection

You should be very familiar with Flash after completing your final movie.  Complete the Flash reflection and assessment in your journal after we watch all the movies created by the class. 

Wednesday, November 19, 2014

EXPLORE AND DISCOVER

What can you discover about ceramics when you explore new ideas and concepts?  


This project will require you to try something new on a small scale.  Your project will be no bigger than 10 inches or as small as you like.  If you are in Advanced Ceramics you have taken this course for over a semester so at this point you have tried most “traditional” methods of construction and glazing.  There is SO MUCH more out there!  So search the internet, especially sites like Pinterest to find something that you think would be interesting to try.  

You will be required to:
  • ·      Try a new method of construction or glazing
  • ·         Create a sketch of what you are doing labeled with the Elements and Principles of Design you are exploring
  • ·         Demonstrate the technique used to the class
  • ·         Complete a self-reflection at the end of construction and glazing


All of these ceramic pieces have something unique about the glazes.  Have you ever added glass to a glaze?  How would you do that?  What kinds of glass can you fire in the kiln?  What about adding multiple layers of texture and glazes?  Have you ever used slip to add a different color then drawn a design taking away the slip?  


Friday, November 14, 2014

Using the Bone Tool in Flash

Designing for the Web

We are going to "Flip the Classroom" for this project. Searching for information about a topic on the Internet can seem simple,  just type in what you need and you get the answers.  Not always.  Sometimes I spend ten minutes watching or reading a tutorial and realize that I am wasting my time.  So what makes a tutorial found on the web worthwhile?  YOU tell me at the end of this lesson, be prepared to share the process with the class.
In this lesson you will be required to:
  • Create a short animation that utilizes the bone tool. This can be a brief showcase of the bone tool.
  • Find useful resources on the web that will teach you how to make an animation utilizing the bone tool. 
If you choose you may work with a partner.  Start your search for information on animations created using the bone tool.  Answer the following questions in a new journal entry.  
  1. What websites were the most helpful to you and who were they published by?
  2. Which sites weren't so helpful to you and who were they published by?
  3. Were there any sites that were blocked from you that you think could have been useful?
  4. Were you able to access any videos of someone creating an animation using the bone tool?
  5. Once you found the information what complications did you have creating the animation?
  6. Did you utilize Photoshop when creating this animation?
  7. How did you and your partner work together? What portions of the work did you do?
  8. What would you like to add to or change about your animation?

Wednesday, November 5, 2014

Flash Final

Designing for the Web

Make your final Flash project a personal work of art that reflects your style and interests. Your final project in Flash should include:
  • shape, classic, motion, and/or motion presets
  • sound
  • ActionScript (play/pause button)
  • a point of view and a clear theme
  • 30 seconds or longer

Below are two examples of ways to approach this project (they are works in progress..).


Expression in Ceramics


Tuesday, November 4, 2014

Multiple Tile Reflection

Take some time to reflect on the process you went through to create your tiles and the final result.  It is always good to learn from your work.

Adding "Action Script" to your Slide-Show

Designing for the Web

The movie below is a final flash project created by a student from a previous semester.  In a few weeks you have been introduced to the very basics of what Flash can do.  We have only scratched the service of what Flash is capable of.  ActionScript was added to the file below.  Action Script is a type of code added into keyframes to add action to the movie.  For instance the action makes the movie start when you press the word "play".  Go ahead and press play and see what happens.In your final flash project you will use the same script to start your own movies.  


Thursday, October 30, 2014

ART CLUB!!

There is a lot going on in Art Club!!  

We will be making a difference by creating portraits for orphans in Ghana this year! Last year we gifted portraits to children in the Philippines  They were so thrilled to get original artwork created by the students at Branford High School!  We can't wait to get started. 


We will also begin creating jewelry, ornaments, and tags using Ceramics.  Art Club members will be looking for inspiration today and writing down the steps needed to create their piece.  Next week will jump in and start working in clay.  Here are some pieces that are inspiring me!  


Slide-Show in Flash

Designing for the Web

Now that you know how to  create Shape, Motion, and Classic Tweens it is time to learn how to create a slide show in Flash.  The images below are fading in and out by adjusting the "alpha" in the color effect area of the properties panel.  

There are many ways to make a slide-show using Flash. You can look up some other ways on the internet or follow the  directions here. Begin by inserting your image to a layer (File-import image to stage), convert it to symbol-choosing movie clip for your option.  Then insert a key-frame 10 frames down the timeline. Insert another keyframe on Frame 25.   On frame 25 make the alpha  0.  After doing this create a Classic Tween between  frame 10 and 25.   On a new layer insert a key-frame where the first picture begins to fade out (frame 10).  Import a new image. Convert to symbol. On this frame the alpha will be 0.  Insert a keyframe 15 frames down the timeline (frame 25).  At this frame the alpha will be 100.  Create a classic tween. Insert a keyframe 10 Frames down the timeline (frame 35).  Insert another keyframe 15 frames down the timeline.  At this frame the alpha will be 0.  Create a classic tween between (frames 35-50).  Repeat this process by inserting a key frame where the previous picture begins to fade out. 


The final part of the slide show is fading the very first picture of the slide in where the last picture is fading out.  This should create a smooth transition from beginning to end.  

When creating a slide show you can speed up or slow down the transitions by putting fewer or greater frames in between the key-frames.  There are many ways to make slide-shows, this is only one way to get you started.
Now create one of your own and place in the "Flash Intro" folder as an .swf when finished. Save as "lastnameslideshow"

Tuesday, October 28, 2014

Bouncing Ball Animation

If you have completed the trace lesson and would like to move ahead and learn some more animation concepts in Flash view the bouncing ball tutorial and start the process of creating this type of animation.

Monday, October 27, 2014

Ceramic Stamps

Creating your own stamp out of clay is a wonderful way to be expressive and creative. Roll out the clay in to a coil, let sit for most of the class, then cut at a right angle at the end.  The clay should dry a couple of days (loosely wrapped) until it is almost leather hard, the consistency of cheddar cheese is perfect.  Then you can use an exacto knife to create your design.  After the design is complete we will fire, then they are ready for use!

Here are some examples below:

Sunday, October 26, 2014

Artist Inspired Piece


Other artists can be a great inspiration for a work of art,especially great artists.   Each of you will be given an artist to research (don’t worry no research paper).  You will jots some notes down about what you  have learned about the artist in your sketchbook. 
Answer the following questions: 
  • ·       When did they live?
  • ·       What “style” are they famous for?
  • ·       How are the Principles of Design used in their work?
  • ·       What is your reaction to their work?

Print out 3 pictures of the artist’s work and keep in your sketchbook.  As each student completes their research they will share with the class. 
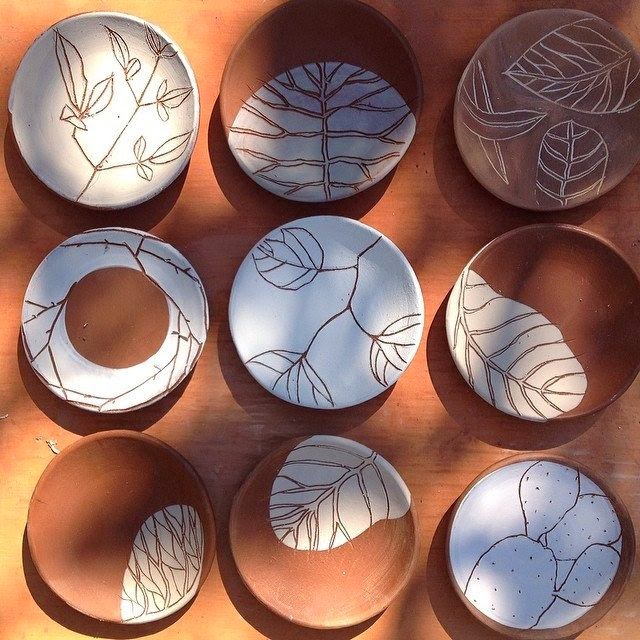
Ceramic Artists that will INSPIRE us...


Beate Kuhn, John Glick, Shiho Kanzaki, Peter Voulkos, Annie Woodford, Hara Kiyoshi, Abe Anjin,  Carol Long, Ellen Schon, Victor Spinski

Friday, October 24, 2014

Drawing in Flash!

If you have completed your shape tween take some time to view the tutorial below to learn a little bit about drawing in flash:

Let me know what you think of the tutorials at the end of the class.

Tracing

This unit takes one or two periods. Students will learn how to convert their own art work or photographs into customized art work ready to animate. Example
You can download the files for this project below:
Joe Dockery, CTE Teacher and Adobe Education Leader, Mount Si High SchoolJoJJoe Dockery, CTE Teacher and Adobe Education Leader, Mount Si High Schooloe Dockery, CTE Teacher and Adobe Education Leader, Mount Si High Schoole Dockery, CTE Teacher and Adobe Education Leader, Mount Si High School

Wednesday, October 22, 2014

Texture in Ceramics!

Texture is an element of design that adds interest and depth to a piece. How is this done and why does it matter?  We will try to answer this today. 

 Begin by searching for images of ceramic pieces that emphasize texture as a design element.  Find 3 that are different and save them to the shared drive (Teachers/Kaiser/Ceramics/Texture folder).  Also, create a word document and insert all the images found into your document, there you can write some notes about how to describe the texture and how it was created.  

We will also want one of the examples of texture printed out for our "Image" wall. Choose your favorite and let the class know which one you are printing so we wont have duplicates. 


After all the images are in the shared drive we will discuss them as a group. The key things we are looking for are:

  • Descriptive words that relay the true nature of the texture.
  • Identify how the texture was created.
  • What other elements or principles of design help us describe the texture of the piece


Monday, October 20, 2014

Action Script 3.0

If you are interested in programming and wrapping your head around Action Script 3.0 go to the Basics in Action Script page to learn more.  We wont delve deep into Action Script in this course but you are welcome to use Action Script in Flash for extra-credit.  

Shape Tween in Flash!


Designing for the Web

When you create a shape tween you morph one shape into another.  It is relatively easy and fun to make!  Follow the guidelines in the shape tween lesson and you will be on your way to designing in Flash.


Thursday, October 16, 2014

Beginning in Flash

Designing for the Web

Flash is used to create short animations and are used often to enhance a website.  This lesson will introduce you to Classic Tween, Motion Tween, and Motion Presets. It will also help you become familiar with the layout of the Flash program.


Wednesday, October 15, 2014

Intro to Flash

Designing for the Web

Flash is used to create short animations, games,  and is used often to enhance a website.  To get started in Flash go to FLASH VOCABULARY GAME. First review all the vocabulary words and concepts,  then test yourself to see how many you remember.  
You should print out your results at the end of the period.  

Friday, October 10, 2014

Surrealism Reflection


Now that you have completed your Surrealistic piece, reflect upon what you have created by answering the following questions in your journal:


Surrealism Reflection:

Copy and Paste your work of art below and answering the following questions:

  What do you feel is successful about your artwork and what could be improved    upon? Please be thorough.
          Do you feel that your message is being portrayed  and why?

      List 3 Surreal elements in your work.
 

      What was the most difficult part of this lesson and why?

Designing for the Web


Gradients are used everywhere on the Web.  Take a look and see!  You will be learning how to create custom gradients that will be utilized when we make
our websites.   Experiment and save your work in the 'Gradients" folder. 

Thursday, October 2, 2014

CREATE a new WORLD!!

Designing for the Web

Now that you have completed your research on Surrealism and are familiar with Photoshop, it is time for you to create your own unique work of art.  Your artwork could make a statement about a global issue or you could focus on something more personal.  Some students in the past have created light-hearted works of art and others delve into more somber issues...it is totally up to you.  We will be animating this photoshop image in Flash so think about ways you will add movement and sound in the future.  The images you see below all include the artist...you can be in your art as well. 
Please read the Surrealistic Lesson Document for more details on the assignment.

Jamie G 2011

Walter K 2011

Josh D 2010

Monday, September 29, 2014

Describe and Analyze


2 Steps of Critique, “Describe and Analyze”

Search for an image of a ceramic piece that uses line as a prominent  design element.  An example of this is the piece below (don't use this one for your critique).   Once you find the piece you like copy and paste it into a word document, then complete the first two steps of critique.  You must use the critique terms, elements and principles of design list, critique checklist, and the critique rubrics to guide you.  BE very thorough with your description. 

This will be counted as a sketchbook grade.


Animal Morph Journal Entry


Journal Entry 2

1.       View all of the animal’s created by the class.  Which image successfully represents the merging of two different species in a seamless manner?  

2.       View your own work.  What do you think is successful and why?  Is there room for improvement? If so what would you improve?


Sunday, September 28, 2014

What is Surrealism?

Designing for the Web

Surrealistic works of art create a dream-like environment. To learn more about this art movement research this intriguing style of art...then start thinking about an image you can create in Photoshop.  Complete the following journal entry on Surrealism and view previous student work for inspiration.


Created by Luke S

Created by Tim O.
Created by Brandon M.

Monday, September 22, 2014


 Calliope, our amazing student literary magazine, is in need of some CREEPY or seasonal art (for those that don't feel like being creepy or spooky).  Create a work of art out of any medium and submit photos of your work to Mr Matthiessen.   I will be happy to take photographs of your artwork if I receive it by September 29th.

All of my classes will get extra-credit for any quality artwork that is created for submission.
DEADLINE FOR SUBMISSIONS September 29th

Create Music with your Writing!

This exercise from Josten's Digital Classroom really illustrates the importance of variety in sentence structure. You will be required to complete this exercise by  Wednesday September 24th.                                
Write narratives to develop real or imagined experiences or events using effective techniques, well-chosen details, and well-structured event sequences.

 “This sentence has five words. Here are five more words. Five-word sentences are fine. But several together become monotonous. Listen to what is happening. The writing is getting boring. The sound of it drones. It’s like a stuck record. The ear demands some variety. Now listen. I will vary the sentence length, and I create music. Music. The writing sings. It has a pleasant rhythm, a lilt, a harmony. I use short sentences. And I use sentences of medium length. And sometimes, when I am certain the reader is rested, I 
will engage him with a sentence of considerable length, a sentence that burns with energy and builds with all the impetus of a crescendo, the roll of the drums, the crash of the cymbals — sounds that say listen to this, it is important.” — Gary Provost

Considering this quote, write about the photo of students racing to their lockers. Then, reread your work and try to vary your sentence length. Edit your work, considering not only punctuation and grammar, but also descriptive detail and sequence.


(from Jostens Digital classroom)

Wednesday, September 17, 2014

    Creative “Slab”    
                          
This lesson will require you to build and embellish a bowl, vase, or cup made from a slab.    BE CREATIVE and EXPERIMENT with techniques that you aren’t familiar with.   We don’t want the same old slab! 


  • This first step in this lesson is to find inspiration! Sights like Pinterest and Etsy will have examples of beautiful pottery created using slabs.  Print out the picture you are using for inspiration AND locate a tutorial on the way the piece was made.  If there isn’t any tutorial available, how else can you figure out how to make the piece?  Write the steps needed to create the piece.  Put all of this information in your sketchbook. 


  • Draw a sketch of the piece you are going to create.   This will be a graded sketchbook assignment.  Review the sketchbook rubrics.  Include Elements and Principles of design, size, color...etc.


REFLECTION

Advanced Ceramics

Sketchbook Entry:

Between construction and glazing take a few minutes to view your work.  Review the vocabulary words and write a brief reaction to the stage you are at in this project. Draw a picture of what your artwork looks like and DESCRIBE it. 

Also  answer the following questions:


                How  and why has my piece changed since the initial sketch?

·                          What do I like most and least about my piece?

·                          What  did I have the most difficulty with during construction?


Monday, September 15, 2014

Designing for the Web

There are tools in Photoshop that can make elephant skin look like lizard skin. In this lesson you will delve deeper into the magic of photoshop. Take a look at your next lesson to find out more.

Friday, September 12, 2014

Advanced Ceramics

The four steps to critique are describe, analyze, interpret, and evaluate. 
We will be critiquing our own artwork, as well as, some famous works of art as the semester continues.  This critique is your first for the semester and will not be counted as a grade. We will learn more about critiquing as the course continues. 

When critiquing a ceramic piece it is helpful to be able to view the piece on all sides.  I have brought a piece in for you to critique so you can see the piece close up.  Below are pictures of the piece.  

Do your best to:

  1. Describe what you see objectively. 
  2. Analyze the technical elements.
  3. Interpret what the artist is saying or wanting to relate with the piece (personal opinion).
  4. Evaluate the work of art you see.


Wednesday, September 10, 2014

BHS ART CLUB!!!

COME SEE WHAT ART CLUB IS ALL ABOUT! 

We meet on most Thursdays in rm. C16 from 2:30-3:30. 
If you cannot make it to a meeting yet, but still want to get involved email
 Mrs Kaiser at lkaiser@branfordschools.org