Our first meeting will be held after school on September 24th in room C16. We will discuss the path the club will take this year so come with ideas and expectations to share! The meeting will end around 3:15. If you cannot make it and would like to get involved see or email me.
Thursday, September 13, 2012
Wednesday, September 12, 2012
Creative Shapes and Text in Photoshop
Designing for the Web
In this lesson you will add a shape and then text to your color portraits. Pay attention to the negative space in your work to find a place where you can add these elements. We are trying to create depth and interest in our piece. The "f/x" tool will help you design and personalize your text. See the full description of the lesson below.
![]() |
| Designed by Tim O. |
Tuesday, September 11, 2012
Self-Reflection and Assessment
Intro to Drawing and Painting
This WEDNESDAY (Sept. 12th) your first self-assessment is due. You will be reflecting upon your gesture and contour drawing sketchbook assignments and the way you embellished your sketchbook cover. Please make sure you view the rubrics and let me know what grade you feel you achieved. There is always some "wiggle" room when it comes to grading, so if you feel like you accomplished some goals, but not others and are not clear about what grade you have earned please speak to me about it. There is also a comment area to clarify why you gave yourself a particular grade.
Remember always focus and apply yourself. If you feel your artwork isn't at the level you want it to be, remember that EFFORT and ATTITUDE is valued more than the ability to draw a "perfect" contour line.
Saturday, September 8, 2012
Scare...spook...FRIGHTEN!!!
Calliope, our amazing student literary magazine, is in need of some CREEPY or seasonal art (for those that don't feel like being creepy or spooky). Create a work of art out of any medium and submit photos of your work to Mr Matthiessen. I will be happy to take photographs of your artwork if I receive it by September 30th.
All of my classes will get extra-credit for any quality artwork that is created for submission.
DEADLINE FOR SUBMISSIONS OCT. 1
Drawing Ellipses
Intro to Drawing and Painting
Now that you are becoming more observant and have completed gesture drawings and contour drawings we will start creating three-dimensional images by adding values and thinking about perspective. A good place to start is by drawing cylinder-like objects, We will be focusing this week on creating representational drawings of cups and flower pots, paying close attention to where the light hits the objects and how highlights, core shadows, reflected light, and cast shadows create depth on a two-dimensional surface.
Sketchbook Assignment: Draw 3 objects that are elliptical. Focus on the value changes that will help you make your drawing have depth.
View the link below to a wonderful tutorial on drawing ellipses:
small object, LARGE DRAWING
Advance Drawing and Painting
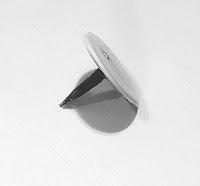
Now that you are all back in the drawing mode it is time for a challenge. Your goal will be to find a very small object to observe and draw VERY LARGE. The drawing you create will be monumental, in that it will portray your object as “massive”, creating drama.
A part of this project is going to be about setting the stage for your object. You will be given a shoe box, a flashlight, duck tape, scissors, and paper. These materials will help you create a strong light source on your object.
![]() |
| A photo of object may help you see the values. |
Your Final Grade for this project will be based on:
· Completion of thumbnail sketch that accurately represents the proportions and values of the object.
· Written statements in sketchbook that reflect upon the process of creating this work of art and your thoughts on how you used the elements and principles of design to create your piece.
· Composition of final charcoal drawing. This includes use of negative and positive space and how the placement and cropping of the object creates movement and interest in the piece.
· Quality of work. Neatness and the accuracy in which the object was drawn large scale.
Wednesday, September 5, 2012
Monday, September 3, 2012
Sketching Shells
Some of you may have been drawing consistently since the last time you were in drawing class...that probably isn't the case with everyone. Let's take a couple of days to sketch a shell. Hold the shell of your choice in your hand You should be beging by feeling the texture of the shell. Notice the proportions of the shell. Place your shell on a white piece of paper. How does the light source create highlights and shadows? Notice the varied values used in these drawings to create the illusion of depth and texture.
Study your shell. Observing the object you are drawing is crucial. Take your time, settle in. There are many ways to begin a drawing. You could very quickly draw a light sketch representing the "skeleton" of your shell using shapes. You could choose to draw gesture-like lines to represent the overall shape of the shell. Another option is to create a contour drawing of the shell. What are you comfortable doing? Try beginning in a variety of ways it is up to you. You can start to add darker values after you feel you have the shape of your shell represented correctly on the paper.
All images were acquired from the internet for educational purposes.
Advanced Drawing and Painting
![]() |
Some of you may have been drawing consistently since the last time you were in drawing class...that probably isn't the case with everyone. Let's take a couple of days to sketch a shell. Hold the shell of your choice in your hand You should be beging by feeling the texture of the shell. Notice the proportions of the shell. Place your shell on a white piece of paper. How does the light source create highlights and shadows? Notice the varied values used in these drawings to create the illusion of depth and texture.
Study your shell. Observing the object you are drawing is crucial. Take your time, settle in. There are many ways to begin a drawing. You could very quickly draw a light sketch representing the "skeleton" of your shell using shapes. You could choose to draw gesture-like lines to represent the overall shape of the shell. Another option is to create a contour drawing of the shell. What are you comfortable doing? Try beginning in a variety of ways it is up to you. You can start to add darker values after you feel you have the shape of your shell represented correctly on the paper.
In a couple of days you should have a few sketches of the same shell in your sketchbook. You will be becoming familiar with drawing again. If for some reason you are advserse to drawing a shell today I have brought a bin of other objects in to choose from.
All images were acquired from the internet for educational purposes.
Subscribe to:
Posts (Atom)


