Friday, February 1, 2013

small objects LARGE DRAWINGS


Advance Drawing and Painting


Now that you are all back in the drawing mode it is time for a challenge.   Your goal will be to find a very small object to observe and draw VERY LARGE.    The drawing you create will be monumental, in that it will portray your object as “massive”, creating drama. 
A part of this project is going to be about setting the stage for your object.  You will be given a shoe box, a flashlight, duck tape, scissors, and paper.  These materials will help you create a strong light source on your object.  
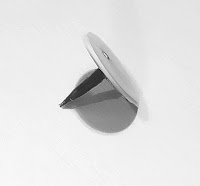
A photo of object may help you see the values.
Study the shadows, mid-tones, and highlights of your object to see how they relate to the form.   Observe the surface of the object and think about ways you will be able to draw its texture.   Begin by drawing a study of the object in your sketchbook.   Near your sketch describe the reasons you chose the object.  Does it carry any symbolic meaning for you?  Were you interested in the texture or shape of the object?  You should be compelled to create the large drawing, so be invested in the object you choose.   After you have completed your thumbnail sketch decide if you would like to crop your object when you blow it up. 
Your Final Grade for this project will be based on:
  •  Set-up of your still-life.  Finding the object you are going to draw,     bring in a flashlight and cardboard box. 
·    Completion of thumbnail sketch that accurately represents the proportions and values of the object.

·    Written statements in sketchbook that reflect upon the process of creating this work of art and your thoughts on how you used the elements and principles of design to create your piece.

·    Composition of final charcoal drawing. This includes use of negative and positive space and how the placement and cropping of the object creates movement  and interest  in the piece.

·    Quality of work.  Neatness and the accuracy in which the object was drawn large scale.

Drawing with a Gesture Line


Intro and Advanced Drawing and Painting


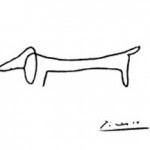
Gesture drawings are sometimes used as a warm up exercise.  Before you sit down to do an elaborate painting/drawing it is good practice to get your mind engaged in the process of creating art by making quick studies of an object/person/landscape.   Changing the line quality of your drawings can help emphasize certain characteristics of the subject.   The exciting thing about gesture drawings is they are never stagnant.  You should purposefully make quick movements with your hand or your whole arm.  Capture the essence of what you are drawing without details.  Action drawing, could describe some types of gesture drawings.  Action drawing involves representing the movement of the subject, for instance a person running, stretching, jumping.  The lines you draw will emphasize the "action" of the figure.


I like the way artist Jill Saur writes about Gesture drawing below.

“Gesture drawings are quick, loose drawings. You don't stop the motion of your hand while doing it. Also, you don't take your pen off of the surface to move it to another point, you just drag it over…
…the gesture drawing focuses more on the inference of the figure, not an exact replica of what you see. 
 Practicing quick gesture drawings will train your eye-brain-hand co-ordination to pick up on lines and see where they are in relation to other lines.  Before you begin a fine drawing or painting, gesture it first to get a 'feel' for what you are going to do.”  


In class we will be drawing several quick sketches of objects and people.  In the beginning we will only be concerned about trying to get proportions correct and capturing the essence of the object on paper.   We will be looking for lines that define the movement and the proportions of the subject matter.
Sketchbook Assignment:
You are required to do a dozen gesture drawings in your sketchbook.  Draw your dog, parents, friends, objects….anything you like, as long as there is variety. The gesture drawings should be timed.  Try 30 seconds to 2 minutes.  Make sure you are timing yourself and stop when the time is up.  

Wednesday, January 30, 2013

Low-Relief Tiles

Intro to Ceramics


You will have many challenges in your first lesson with clay.  How do you compose a design within a square or rectangle?  What subject should you use for an impetus for your tile design?  How can color enhance your design?  How do you cut away  and add clay to create a low-relief sculpture?  How do you roll out a slab of clay?  

You will be required to create no less than 3 tiles. The examples above show tiles that are related to each other.  The  3 tiles you create do not have to be related to each other (see examples below).   One tile will be bas-relief and glazed, the other two will have different surface treatments.  A thumbnail sketch is required before you begin working with the clay. In your thumbnail sketch you should write down the colors you will be using.  Think about the negative and positive space as you try to create a balanced composition.    

In relief sculpture you can cut the background away, add clay to the surface, or do both.  In low-relief sculpture there is little depth and the objects/designs are close to the surface.  Sometimes low-relief sculpture is called bas-relief. A coin is a great example of this.

When searching for inspiration do not copy a tile you see on the Internet.  Look for images that inspire you, but don't duplicate that image, create a unique image.  You can also use your surroundings for inspiration, trees, animals, mountains, roads...etc.  Your tile can be based on something organic or not.  Less complicated lines and shapes will work best with the medium. Your short-term goal is to have an idea designed in the next few classes.  As students are ready to begin working with clay I will demonstrate the techniques and methods pertaining to the lesson.


You can view tiles created by Mrs. Monk's art classes at Monk's Art Class Blog

Below are examples found on the internet from random websites.


Tuesday, January 29, 2013

Spring Semester Schedule!


Spring Semester Schedule                                Mrs.Kaiser

Period 3: Web Design Course Syllabus

Period 6: Intro to Drawing and Painting Course Syllabus

Period 7:  Advanced Drawing and Painting  Course Syllabus

Period 8: Intro to Ceramics Course Syllabus